Download and Install Apache Hive
wget https://apache.osuosl.org/hive/hive-3.1.2/apache-hive-3.1.2-bin.tar.gz
					tar -xzf apache-hive-3.1.2-bin.tar.gz
mv apache-hive-3.1.2 hive
Hive Environment Variables.
					vi ~/.bashrc

#Hadoop configurations
export HADOOP_HOME=/home/ubuntu/hadoop
export PATH=$PATH:$HADOOP_HOME/bin
export PATH=$PATH:$HADOOP_HOME/sbin
export HADOOP_MAPRED_HOME=${HADOOP_HOME}
export HADOOP_COMMON_HOME=${HADOOP_HOME}
export HADOOP_HDFS_HOME=${HADOOP_HOME}
export YARN_HOME=${HADOOP_HOME}

#Hive configurations
export HIVE_HOME=/home/prabha/hive
export PATH=$PATH:$HIVE_HOME/sbin:$HIVE_HOME/bin
export CLASSPATH=$CLASSPATH:$HADOOP_HOME/lib/*:$HIVE_HOME/lib/*
source ~/.bashrc
Edit Hive Configurations
Hive distribution comes with hive-default.xml.template @ $HIVE_HOME/conf directory, copy this file to hive-site.xml file.
cp conf/hive-default.xml.template conf/hive-site.xml
vi conf/hive-site.xml
1. Replace all occurrences of ${system:java.io.tmpdir} to /tmp/hive
This is the location Hive stores all it’s temporary files.
2. Replace all occurrences of ${system:user.name} to username, the username should be the one you log in with.
After replace above two properties, you should have something like below for the properties you updated.
					<property>
    <name>hive.exec.local.scratchdir</name>
    <value>/tmp/hive/prabha</value>
    <description>Local scratch space for Hive jobs</description>
</property>
 <property>
    <name>hive.downloaded.resources.dir</name>
    <value>/tmp/hive_io/${hive.session.id}_resources</value>
    <description>Temporary local directory for added resources in the remote file system.</description>
</property>
<property>
    <name>hive.querylog.location</name>
    <value>/tmp/hive/prabha</value>
    <description>Location of Hive run time structured log file</description>
</property>
<property>
    <name>hive.server2.logging.operation.log.location</name>
    <value>/tmp/hive/prabha/operation_logs</value>
    <description>Top level directory where operation logs are stored if logging functionality is enabled</description>
</property>
3. Hive Database warehouse location
Hive by default stores data warehouse location as /user/hive/warehouse, if you wanted to change, specify your preferred location on the below property.
					<property>
    <name>hive.metastore.warehouse.dir</name>
    <value>/user/hive/warehouse</value>
    <description>location of default database for the warehouse</description>
</property>
4. Hive Metastore database
I will be using default embedded Derby Metastore, in case if you wanted to use MySQL or any other RDBMS database, change the below configurations accordingly.
					<property>
    <name>javax.jdo.option.ConnectionURL</name>
    <value>jdbc:derby:;databaseName=metastore_db;create=true</value>
    <description>
      JDBC connect string for a JDBC metastore.
      To use SSL to encrypt/authenticate the connection, provide database-specific SSL flag in the connection URL.
      For example, jdbc:postgresql://myhost/db?ssl=true for postgres database.
    </description>
</property>
Create Hive Warehouse Directories
DAs mentioned in the introduction, Hive uses Hadoop HDFS to store the data files hence, we need to create certain directories in HDFS in order to work
First create the HIve data warehouse directory on HDFS.
hdfs dfs -mkdir /user/hive/warehous
and then create the temporary tmp directory.
hdfs dfs -mkdir /user/tmp
					hdfs dfs -chmod g+w /user/tmp
hdfs dfs -chmod g+w /user/hive/warehouse
Create Hive Metastore Derby Database
Post Apache Hive Installation, before you start using Hive, you need to initialize the Metastore database with the database type you choose. By default Hive uses the Derby database, you can also choose any RDBS database for Metastore.
Run the schematool -initSchema -dbType derby command, which initializes the derby as Metastore database for Hive.
					cd $HIVE_HOME
prabha@namenode:~/hive$ bin/schematool -initSchema -dbType derby
This outputs below.
					prabha@namenode:~/hive$ schematool -initSchema -dbType derby
SLF4J: Class path contains multiple SLF4J bindings.
SLF4J: Found binding in [jar:file:/home/prabha/hive/lib/log4j-slf4j-impl-2.10.0.jar!/org/slf4                                                                        j/impl/StaticLoggerBinder.class]
SLF4J: Found binding in [jar:file:/home/prabha/hadoop/share/hadoop/common/lib/slf4j-log4j12-1                                                                        .7.25.jar!/org/slf4j/impl/StaticLoggerBinder.class]
SLF4J: See http://www.slf4j.org/codes.html#multiple_bindings for an explanation.
SLF4J: Actual binding is of type [org.apache.logging.slf4j.Log4jLoggerFactory]
Metastore connection URL:        jdbc:derby:;databaseName=metastore_db;create=true
Metastore Connection Driver :    org.apache.derby.jdbc.EmbeddedDriver
Metastore connection User:       APP
Starting metastore schema initialization to 3.1.0
Initialization script hive-schema-3.1.0.derby.sql
Initialization script completed
schemaTool completed
Start Hive CLI Terminal
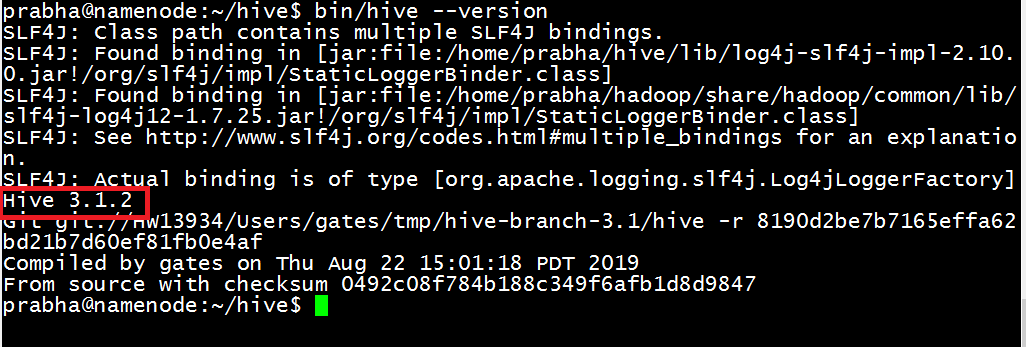
Let’s check if Hive installed properly by running hive --version command.

Run Hive CLI to run some HiveQL queries.
prabha@namenode:~/hive$bin/hive
Now run the show databases from Hive CLI and confirm you are seeing the below output. Hive by default comes with default database.

Start Hive Beeline
There are several limitations using Hive CLI hence in the new version its been deprecated and introduced Beeline to connect to Hive.
Hive beeline can be run in an embedded mode which is a quick way to run some HiveQL queries, this is similar to Hive CLI (older version).
					prabha@namenode:~/hive$ bin/beeline -u jdbc:hive2:// -n scott -p tiger
Connected to: Apache Hive (version 3.1.2)
Driver: Hive JDBC (version 3.1.2)
Transaction isolation: TRANSACTION_REPEATABLE_READ
Beeline version 3.1.2 by Apache Hive
0: jdbc:hive2://>
Now run show databases to get the list of databases.
Now run the show databases from Hive CLI and confirm you are seeing the below output. Hive by default comes with default database.
Start HiveServer2
You can also connect to Hive from a remote server by starting Hive HiveServer2.
prabha@namenode:~/hive$ $HIVE_HOME/bin/hiveserver2

Now you can connect to Hive from a remote server either using Beeline or from Java, Scala, Python applications using Hive JDBC Connection string
prabha@namenode:~/hive$ bin/beeline -u jdbc:hive2://192.168.1.1:10000 scott tiger
Hope you like Apache Hive Installation and able to setup and run Hive on your system, If you get any issues while setting up Hive, please specify the issue in comment, I will reply to it with the solution.
Happy Learning !!
Related Articles
- How to Connect to Hive Using Beeline
- Hive – Start HiveServer2 and Beeline
- Hive Date and Timestamp Functions | Examples
- Hive Partitioning vs Bucketing with Examples?
- Hive DDL Commands Explained with Examples
- Connect to Hive using JDBC connection
- How to Update or Drop a Hive Partition?
- Hive Partitions Explained with Examples
